Do you love to blast your tunes while you’re driving back and forth from work or when you’re simply riding for fun at the weekends, but your stereo is broken?
Do you want to impress your friends with your blasting and perfectly pulsing hits? Has your factory stereo lost its glossy sheen? Or, are you simply looking for a change with more features?
Well, if you answered positively to either of these questions or have your own reasons, it’s probably time to look for an aftermarket stereo that meets your needs and fits your car. If you’ve decided to upgrade your car stereo, you’re going to need to know how to install one.
Now, the DIY Installation process isn’t rocket surgery.
This is a complete guide on how to install a car stereo yourself. We walk you through all the steps for properly installing your brand new stereo. Read over these instructions before you begin the installation process to give yourself an overview of what to expect.
First Things First: : How to Remove a Car Stereo
This is only a general guideline to get you started. Each vehicle is different. However, the process will be almost the same with minor changes.
The first thing you should do when planning on installing any electrical components is to remove the negative cable on your battery to prevent electrical shocks and protect the electrical components.
Factory stereos are usually mounted in one of two ways :
- Fixed in a metal mounting sleeve using spring clips.
- Bolted to your car’s dashboard with brackets.
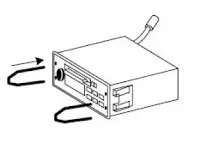
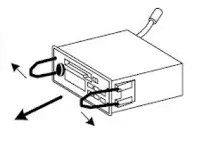
Spring clip mounting
If your factory receiver is mounted using spring clips, get a pair of DIN tools (usually U-shaped) to slip on the right and left sides of the stereo to unlock the unit easily. The DIN tools release the clips and serve as handles so that you can pull out the old receiver (You’ll hear a click when it’s disconnected). As the clips are released, spread the tools apart a bit so the stereo can slide out of the dash.
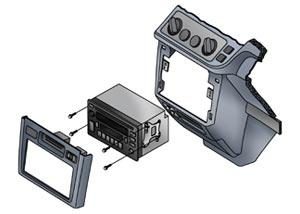
Bolted in place
Things can be a bit complicated with your receiver being bolted in place. You’ll need to remove a few other pieces before you gain access to the stereo itself, locate and remove bolts. Stereos mounted this way are usually secured by a few screws.
Use a screwdriver to unscrew them and easily pull the stereo from the dash and pay attention to the wiring connections on the back. Make sure to label or remember where each cable connects for future reference. It might even be a good idea to draw a simple, self-explanatory diagram, noting the colors of all those wires.
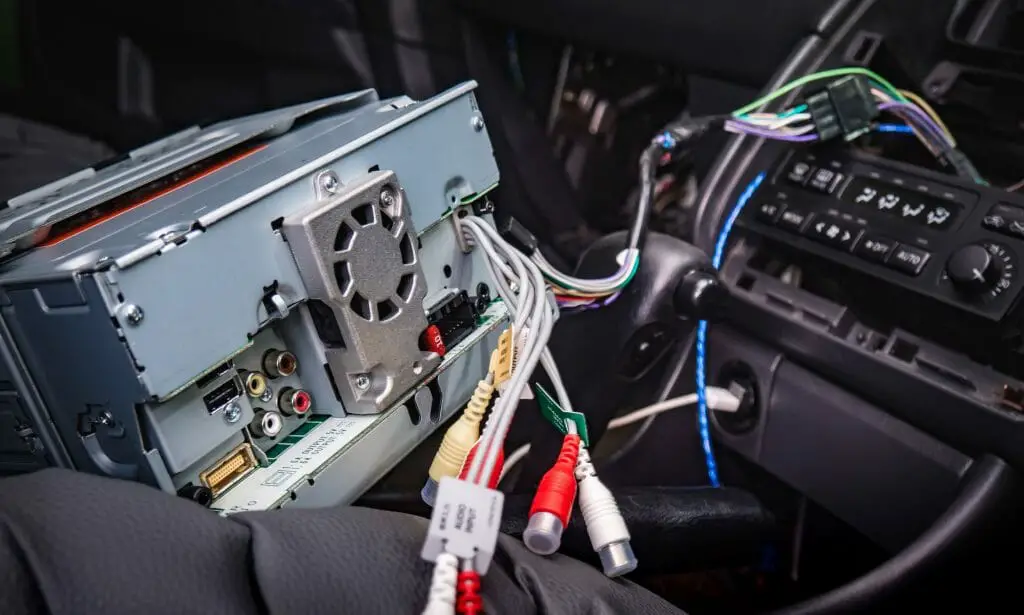
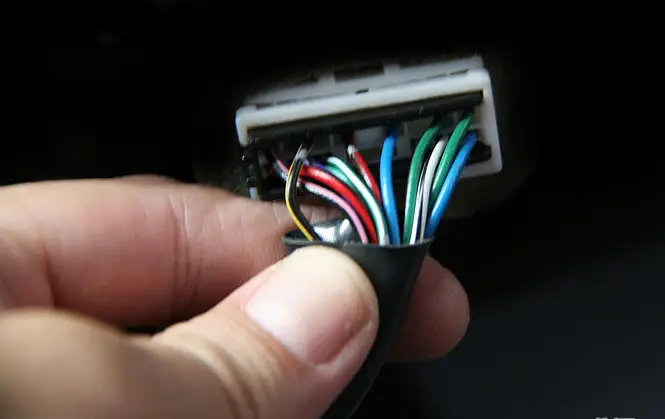
Unplugging the factory stereo
If your vehicle is equipped with a factory stereo, or if it was wired before with a “stereo prep” package, you’ll notice that there’s a wiring harness inside the opening. This wiring harness feeds your stereo with power and drives audio signals to your speakers. Unplug it to complete your stereo removal process.
Wiring
Fortunately, the majority of car stereos come with a wiring harness. So, plug in the wiring harness from your car to the new stereo, and everything will work seamlessly, just like the factory stereo made no muss, no fuss; however, if no harness is supplied, or if the factory stereo plug was previously cut off, you’ll need to make a hardwired harness by matching and connecting the wires from your car’s harness to the corresponding wires of the new receiver.
Instead of just twisting the wires together for reliable joints, you’d better use solder or a crimped connector.
Crimping and Soldering – Which one is better ?
Crimping or soldering your wires boils down to a personal choice. Crimping is easy as a pie, and it can be done in a flash. Use the correct size crimp connector — for car stereos, we usually use 18-gauge. Crimp connectors come in various types, including crimp caps, butt connectors, or bullet connectors.
On the other hand, Soldering your wires leaves you with a professional connection that will last longer and ensures maximum signal transfer. It’s highly recommended that you use heat-shrink tubings to cover the joint after it is made.
Taping wires is another short-term solution to be avoided — the tape dries out fast starts to fall off, especially in hot climate conditions.
Power
Combining all stereo wiring connections in a wiring harness is usually the best approach. But if you have your own reasons and want to make a direct power connection instead, you should know the difference between switched and constant power.
- Switch mode power (AKA +12 Volt Ignition Wire) – This simply means that your stereo will turn off when you turn off the engine – to avoid draining your car’s battery.It’s usually the case when a switched power source is what’s used to feed your stereo with power.
- Constant mode power (AKA +12 Volt Battery Wire) – This mode allows the stereo to have a constant source of power,so that it remembers all your settings and station presets.If a car stereo is constant powered , that means it’s attached to the main source of power.
When you install a car stereo in rare cases, a few high-powered aftermarket stereos require a direct connection at the positive terminal of your car’s battery.
For this, you’ll need a strong gauge power wire, an in-line fuse that is usually included, as well as a ring terminal crimp to attach the power wire to the battery. Things can get a bit dirty as you’ll have to run the power wire through your vehicle’s firewall into the engine and from there to your battery.
In-dash video wiring
If you’ve purchased a double din head unit or a car stereo with a large touchscreen, chances are high your stereo has video functionality. To play videos on your stereo, you’ll need to connect a wire to your parking brake wire.
Manufacturers integrated this feature as a safety procedure to avoid distracted by videos while driving(there is a workaround on how to bypass this safety procedure).
The wire attached to the parking brake serves as a switch and turns on the video feature when the parking brake is fully engaged.
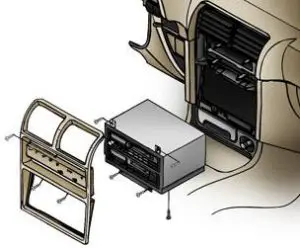
How To Install a Car Stereo (Single & Double DIN)
Many factory stereos are mounted using some brackets. Remove these brackets and attach them to your new stereo. You’ll likely need a mounting kit (mounting kits usually consist of a dash insert, brackets or backstraps, mounting sleeve, trim ring …etc.) to install a new car stereo.
If you install a car stereo, include a mounting kit, install it first, and then slide the metal mounting sleeve into the kit. Next, use a flat blade screwdriver to secure the sleeve’s metal tabs inside the enclosure.
Now, as everything is ready, hold your new stereo close to the opening and plug in the stereo wires adapter to your vehicle’s harness. Next, slide the receiver into its opening, and test it first before fastening it down.
Once you’re sure everything works as desired,re-install the unmounted pieces, and you’re good to go.