
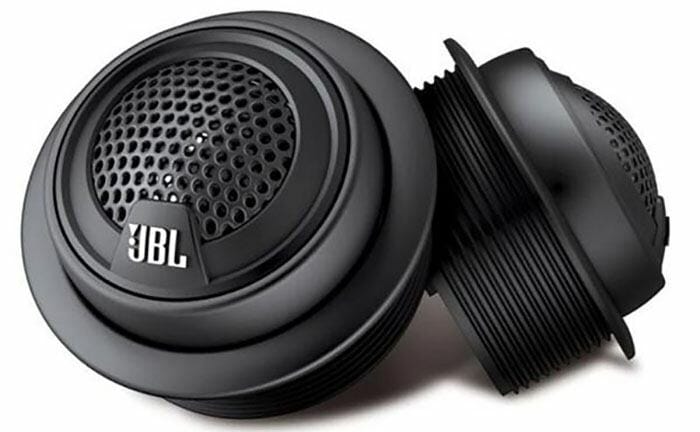
Adding tweeters is the fastest way to wake up a dull car stereo. Those little high-frequency drivers pull cymbals, vocal detail, and “air” up onto the dash where your ears expect it, instead of leaving your sound buried in the door. Installing tweeters, in anything from a stock Corolla to a full show build, is a beginner-friendly afternoon job.
The short version: mount the tweeter high and aimed at your head (A-pillar, sail panel, or upper door), wire it through a crossover so it only ever sees high frequencies, connect it in the same polarity as its woofer, and test at low volume before you button up. Below I break down every piece so you do not blow a tweeter or drill a hole you regret.
Tools and materials you will need
Nothing here is exotic. Most you already own, the rest is cheap insurance against a bad install.
- Panel removal tools (plastic pry tools) so you do not crack trim.
- Socket and screwdriver set for door cards, kick panels, and sail panels.
- Wire strippers and crimpers.
- Crimp connectors or a soldering iron plus heat shrink. Soldered, heat-shrunk joints last longer in a door that sees heat, cold, and vibration.
- Electrical tape and zip ties to dress and secure the wiring.
- Speaker wire, typically 16 or 18 gauge for a tweeter run.
- The crossovers that came with your component set. Do not lose these.
- A drill and step bit only if you are flush mounting or cutting a new opening.
- A multimeter to check polarity and confirm signal.
- A test track you know well so your ears have a reference while you aim.
If your tweeters shipped as part of a component system, everything electrical you need is in the box. If you bought a standalone pair of add-on tweeters, confirm they include inline crossovers or bass blockers before you install them. That detail decides whether the job is safe.
Where to mount tweeters in your car
Location matters more than most people expect. A great tweeter aimed at your knees sounds worse than a modest one aimed at your face. Get high frequencies up near ear level and pointed at your listening position, because treble is highly directional and does not bend around obstacles like bass does.
One rule: keep the tweeter within roughly 12 inches of the midrange it plays with. Too far apart and the two drivers arrive out of step, smearing the sound and hollowing out the midrange. Close spacing keeps them integrated.
A-pillar
Mounting in the A-pillar (the trim beside the windshield) puts the tweeter high, close to ear level, and lets you aim it straight at your head. This is the best-sounding location in most cars and the one to choose when staging matters. The tradeoff is effort: you buy or build angled pods, and it is the most visible install, so sloppy work shows. Done well it looks factory.
Dash corners
The outer corners of the dash are a strong compromise. Height is decent, the windshield reflection can widen the soundstage, and many cars have factory tweeter grilles right there for a clean drop-in. If yours does, start here.
Sail panel
The sail panel is the small triangular trim in the front corner of the door, inside the mirror. It is a popular factory tweeter spot: high on the door, close to the woofer below, and it often accepts a tweeter with minimal fuss. Aim is less ideal than an A-pillar pod, but for the effort it earns its keep.
Upper door panel
Mounting in the upper door keeps the tweeter near the woofer, which helps the two drivers integrate. The downside: it tends to fire across the car or at your arm rather than your ears, so treble can feel low and off to the side. Easy and it works, but rarely the best your system can do.
Kick panels
Kick panels (down by your feet) can equalize the path length from both speakers and center the image beautifully, but they demand fabrication and careful aiming and expose the drivers to dirt and feet. An enthusiast move, not a first install.
Mounting locations compared
| Location | Sound quality | Install difficulty | Look |
|---|---|---|---|
| A-pillar | Best staging and aim | Hard (angled pods) | Custom, very visible |
| Dash corners | Very good, wide stage | Easy if factory grille exists | Clean, often stock-looking |
| Sail panel | Good, near the woofer | Easy to moderate | Factory-style |
| Upper door | Fair, poor aim | Easy | Blends into door card |
| Kick panel | Great imaging, needs work | Hard (fabrication) | Hidden, low |
Wiring options: crossover vs tweeter-level
This is the part people get wrong, and it decides whether your tweeters survive. A tweeter is small and light, built to reproduce only high frequencies. Feed it a full-range signal with kick drum and bass line and the voice coil tries to move for low notes, overheats, and dies. Every crossover choice below exists to stop that.
Component crossover (the right way)
A component set comes with a passive crossover network, a small box with inputs and two sets of outputs. Your source feeds it, and it splits the signal: highs to the tweeter, lows to the woofer. Each driver only ever sees frequencies it can handle. This protects the tweeter, blends the drivers cleanly, and is how the manufacturer voiced the set. Always use the included crossover, it is not optional hardware you skip to save time.
Inline bass blocker (add-on tweeters)
Standalone add-on tweeters usually ship with a small inline capacitor called a bass blocker. It is a simple high-pass filter that solders or crimps in line with the tweeter and blocks low frequencies. Not as refined as a full crossover network, but it does the one critical job: it keeps bass out of the tweeter. If yours did not include one, buy one first.
Tweeter-level (parallel off the woofer)
You will see people wire an add-on tweeter in parallel with an existing coaxial speaker, tapping the same wires. This works only with a bass blocker or crossover in line. The woofer feed is convenient but full-range, so the filter still has to sit between the tap and the tweeter. Never run a tweeter off a speaker line with no filter.
The rule under all three is the same: a tweeter must never see bass. Component crossover, inline bass blocker, or a high-pass on your amp, something must remove the low frequencies before they reach the tweeter. Skip it and it is not a question of if the tweeter blows, only when.
Step-by-step tweeter installation
- Disconnect the negative battery terminal. You are working around live wiring and airbags live in some A-pillars. Kill the power first, every time.
- Plan the run and dry-fit. Before you cut or drill, hold each tweeter at its spot, sit in the seat, and confirm the aim points at your head. Route wire loosely back to the crossover and source to confirm the run works.
- Remove the trim. Use plastic pry tools to pop the sail panel, A-pillar cover, or door card. Work slowly around clips. Set screws in a labeled cup so nothing walks off.
- Mount the crossover. Fix it somewhere solid and dry, inside the door cavity or behind the kick panel, where it will not rattle or get wet. Keep it accessible for later.
- Run the wire. Feed speaker wire from the crossover tweeter output to the tweeter. Protect it through the door boot, zip-tie it, and keep it away from window mechanisms and sharp edges.
- Wire the tweeter with correct polarity. Positive to positive, negative to negative, matching its woofer. One driver backwards throws them out of phase and gut-punches your midrange.
- Mount the tweeter. Surface mount clips on top of the panel and is easiest. Flush mount recesses it for a factory look and needs a hole cut with a step bit. Angle mount tucks it behind an existing grille. Secure it so it cannot vibrate loose.
- Test before you close up. Reconnect the battery, set the volume low, and play a familiar track. Confirm both tweeters produce sound and treble is present but not harsh. Catch a dead channel or reversed wire now, while the panels are off.
- Reassemble and dress the wiring. Reseat trim clips, reinstall screws, tuck away slack, and do a final listen at normal volume.
Tuning and aiming your tweeters
Installation gets sound out of the tweeter. Tuning gets good sound out of it, and twenty minutes here makes a real difference.
Aim on-axis first, then relax it. Point both tweeters directly at your head for the most detail and sharpest image. If the treble feels too bright, angle them slightly off-axis, toward the windshield or across the car, until it smooths out. Small increments, listen after each.
Use the crossover level pads. Many component crossovers include a switch or resistor tap that attenuates the tweeter by a few dB. If the highs jump out ahead of the rest, drop the level a notch. If they feel buried, bump it up.
Set the high-pass on your source. If your amp or head unit has crossover controls, set a high-pass on the tweeter channel, commonly in the low thousands of hertz. Check the manufacturer’s minimum recommended crossover point and never set it lower.
Check phase by ear. Play a track with a strong center vocal. If the singer sits as a solid image straight ahead, your phase is right. If the vocal feels vague, wide, or like it comes from the doors, one tweeter is backwards. Swap that tweeter’s two wires and listen again.
Common tweeter install mistakes
- Running the tweeter full-range. The number one killer. No crossover or bass blocker means bass reaches the tweeter and cooks it.
- Reversed polarity. One tweeter wired backwards drops your midrange into a hole. Match polarity to the woofer and verify by ear with a center vocal.
- Mounting too far from the woofer. Big spacing smears the sound. Keep them within about a foot.
- Aiming at the floor or door. A tweeter firing at your knee wastes its detail. Get it high and pointed at your ears.
- Overdriving with too much gain. Gains set too high push a small tweeter past its limits, it distorts, then fails. Set gains properly.
- Pinched or chafing wire. An unprotected wire run eventually rubs through on a sharp edge and shorts. Use the factory boot and zip-tie the run.
- Skipping the low-volume test. Closing up the panels before you confirm sound means tearing them apart again when a channel is dead. Test first.
Safety and wiring notes
Disconnect the battery before touching any wiring. Beyond shock and short risk, many A-pillars house airbag components you do not want to disturb live.
The crossover is the most important part here, so understand why it exists. A tweeter’s voice coil and diaphragm are tiny and light, built to move fast for high frequencies and nothing else. When bass hits it, the coil tries to make big, slow movements it was never designed for, drawing far more power and generating heat it cannot shed. It overheats and fails, often within a few songs at volume. A crossover removes those low frequencies first. Running a tweeter full-range is not a shortcut, it is a countdown.
Match your tweeter’s impedance and power handling to your amp or head unit. Most car tweeters are 4 ohm, and a component set is already matched internally through its crossover. If you mix and match separate parts, confirm the numbers line up so you do not overload the amp.
Frequently asked questions
Do tweeters need a crossover?
Yes. A tweeter must be protected by a crossover or inline bass blocker so it only receives high frequencies. Run it full-range and the bass overheats the voice coil and destroys it. Component sets include a passive crossover; add-on tweeters usually include a bass blocker capacitor. Never wire one without it.
Can you wire tweeters to your existing door speakers?
You can tap the door speaker wires as a signal source, but only with a bass blocker or crossover in line. That feed is full-range, so the filter must sit between the tap and the tweeter. Wired directly, the tweeter will fail.
Where should I mount tweeters for the best sound?
Mount them high and aimed toward your head. The A-pillar gives the best staging, the dash corners are a strong easy option if factory grilles exist, and the sail panel is a great low-effort spot near the woofer. Keep it within about 12 inches of its midrange.
Do tweeters need an amp?
No. They play off your head unit or the same amplified channel as your component woofers through the crossover. An amp gives cleaner power and headroom, but it is an upgrade, not a requirement.
Why did my tweeter blow?
Almost always one of two reasons: it saw bass because there was no crossover or bass blocker in line, or it was overdriven with the gain too high. Both overheat the tiny voice coil. Reversed polarity hurts your sound but usually will not kill a tweeter. Filter the signal and set gains sensibly, and tweeters last for years.
Can I flush mount or do I have to surface mount?
Either works. Surface mounting sits the tweeter on the panel with a cup and clip and needs no cutting, so it is easiest. Flush mounting recesses the tweeter for a factory look but requires drilling with a step bit. Choose based on your panel and how confident you are with a drill.
Next steps
Tweeters are usually one half of a bigger front-stage plan. Still deciding on speakers? Our breakdown of component vs coaxial speakers explains why component sets image so much better. For an affordable pair to build around, read our Polk DB651 review, or compare a wider field in the best 6.5 car speakers. Doing the woofers too? Our guide to installing car speakers covers the door side of the job.
About this guide
RideBass Team
Researched from manufacturer specifications, independent tests and owner reports, and edited for accuracy by the RideBass team.