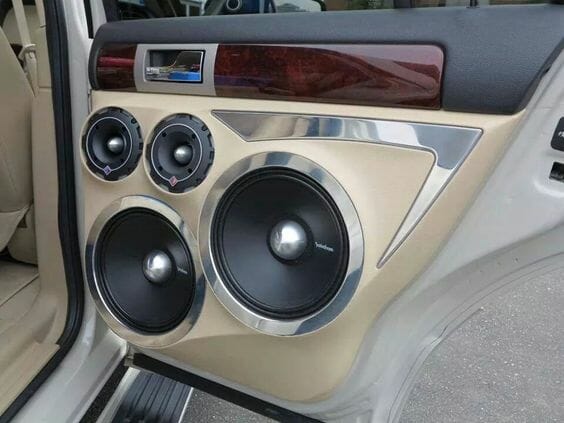
If you have decided to venture into car audio system upgrading, you will need to know how to install the tweeters. Tweeters are a sort of speaker designed to cover high frequencies that typical speakers can’t reach. They work in conjunction with woofers (woofers cover low-frequency sounds – bass) to deliver a well-balanced sound. Installing them isn’t rocket surgery. Instead, it’s a straightforward process.
Typical speakers that work in conjunction with tweeters are called components. They are the best type of speakers when it comes to sound quality. However, component systems tend to cost a bit more than their counterparts – coaxial speakers. On the other hand, Coaxials combine all the drivers, including woofer, tweeter … in one single unit, which makes them less expensive and easier to install.
To properly function, you’ll need to install a crossover that redirects sound signals from a head unit or amplifier to the most suitable component. If one is used, higher frequencies to the tweeters and lower frequencies to the woofers or the external sub. This results in a far better stereo-imaging and a wider sound stage.
Tweeters can be mounted in different ways, such as flush, angled, or surface mounting. Whichever mounting option you decided to go with, make sure your tweeters are above the woofers and mount them so they can broadcast towards your ears for a realistic sound-stage and stereo image.
Standard mounting options
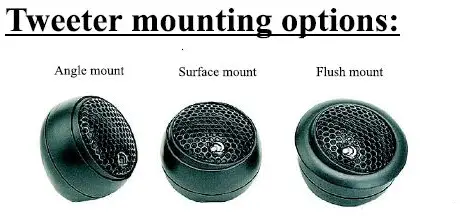
Surface mounting
The tweeter is mounted on top of the mounting location and held inside a cup secured to a surface with a screw holding the tweeter in place. You might want to consider surface-mount your tweeters if you want to keep your car’s interior unchanged or if you don’t have the depth to accommodate flush mounting. The only downside I can reasonably think of is that surface mounting will leave you with a noticeable installation.
Flush mounting
It consists of drawing a hole on the dashboard or on the door to accommodate the tweeter. The main advantage of this option lies in its smooth, customized look since the tweeter sits flush with the interior panel. Nowadays, many manufacturers include angle-mounts that allow the users to adjust the tweeter’s broadcasting angle slightly, even when your tweeters are mounted within the panel.
Bottom mount
The tweeters are usually mounted under an existing grille, so you won’t need to make new holes.
Common Tweeter placement
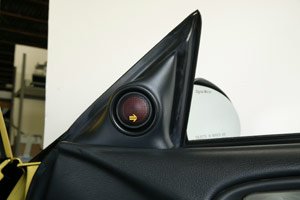
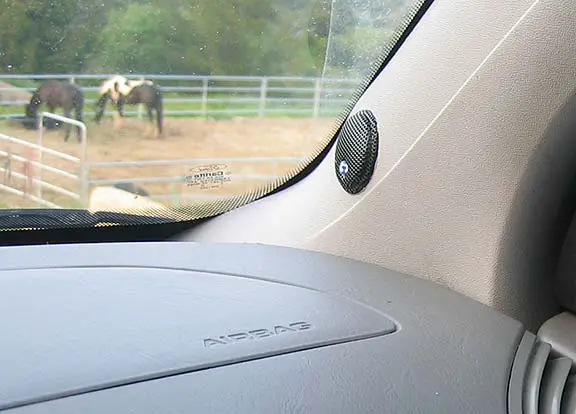
Sail Panel
The sail panel is the part situated in the top corner of your door window. Some vehicles come with their factory tweeters mounted right there. If your car came with factory tweeters, the bottom mount is your best mounting option. Otherwise, consider flush mounting.
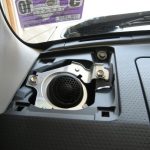
Dash Edges
If your vehicle is already equipped with factory tweeters in the dash, the bottom mount is your best option. You won’t need to create new holes, but you might need a bracket to secure the new tweeter.

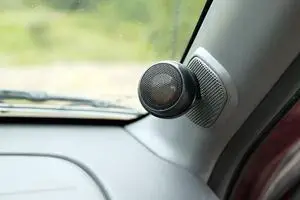
“A” Pillar
The “A” pillar is the near-vertical support that sits between the front windshield and the front door. It’s the best spot to surface mount your tweeter.
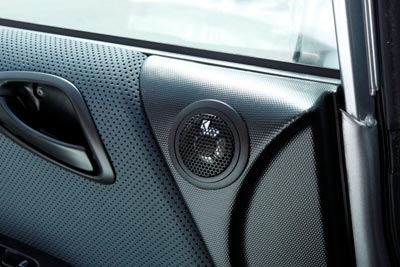
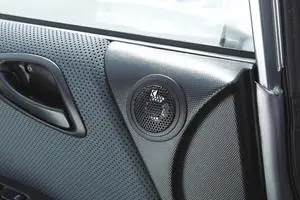
Upper Door
It consists of drilling a large hole in the door panel to accommodate the new tweeter. And it makes total sense when your car isn’t equipped with factory tweeters or when the factory tweeter location is too tight to work with.
Whichever method or location you choose, bear in mind that manufacturers recommend that your tweeters should be mounted within 12 inches of the speakers. Otherwise, sound frequencies emitted by both the woofers and tweeters may reach your ears at slightly different times, resulting in waves interference or acoustic phase cancellation.
Tweeters Installation Process
Step #1: Cut The Power Off At The Source
You should disconnect the negative (-) terminal from your car’s battery. It’s a crucial step to prevent a possible electrical short-circuiting or damage to your car’s electrical components.
Step #2: Gain access to the speakers and tweeters
Each vehicle is different but gaining access to your speakers is a straightforward process. First, locate where the speakers and tweeters are mounted and take them out. For instance, if you’re installing component speakers on your car’s doors, you’ll likely have to remove the panel.
Step #3: Get rid of the old stuff
Once you are in, disconnect all the wires and get a screwdriver, speakers and tweeters are usually secured in their mounting location via screws, so use a Phillips-head driver to unscrew the screws holding them.
Step #4: Adding crossovers
As you’ve removed your old speakers and tweeters, connect your receiver or external amp power output wire to the crossover. Solder the crossover cable’s input to the main power source. Make sure the polarities (+ and -) are correctly connected.
Step #5: High-frequencies to the tweeter – low frequencies to the woofers
All you need to do is connect the high-frequency wire from the crossover to the tweeter and connect the low-frequency wire to the woofer.
Step #6: Re-mounting
The only left thing to do is to put both speakers and tweeters in their mounting location, ensuring that each component fits securely. However, that’s not always the case. Sometimes you’ll need to drill some holes either on the dash edge or on the door panel to accommodate the new tweeters.
Ensure that the mounting location has access to existing speaker wiring.
As for speakers, you’ll probably have bought some mounting brackets to make them fit on their original enclosures.
Types of Tweeters
There are many different kinds of tweeters, but these are the most popular types:
Dome
The main job of a dome tweeter is to generate an extensive, linear frequency response across the whole audible spectrum. It achieves this by producing sound through motion, which enables it to span much of the frequency range but not all of it.
Since the dome needs to be thin and accurate, dome tweeters are frequently more costly and fragile than other types of tweeters.
Piezo
The main job of a piezo tweeter is to generate a broad, linear frequency response across the full audible frequency range. A piezo tweeter does this by producing sound using both pistonic and non-pistonic motion, which enables it to capture almost all of the frequency range but not all of it (it produces low frequencies better than high).
Piezo tweeters are frequently compact, lightweight, and simple to incorporate into speaker designs. As a consequence, they are frequently used in stereo or home theater systems when tweeter size is not a major consideration. However, although still operating well acoustically, tweeter performance is most crucial in terms of aesthetics.
Cone
The primary priority of a cone tweeter is to generate an extensive, linear frequency response across the full audible spectrum.
Cone tweeters are frequently lightweight and compact, making it simple to incorporate them into speaker designs. They are frequently utilized for audio or home theater setups where the tweeter’s size isn’t a huge concern and the tweeter still sounds great.
How to Pick the Best Tweeter
Whether you require a tweeter with a broad dispersion or one with a more narrowly focused directionality, you should choose one based on your demands.
If you want a tweeter for singing, for instance, pick one with purity and responsiveness in the upper notes. If you want your tweeter to withstand powerful bass notes, on the other hand, be sure it has adequate low-frequency expansion.
There are several different kinds of tweeters on the market, including cone-style, dome, and ribbon tweeters. Each one has specific benefits over the other styles.
Cone-type tweeters, for instance, are easily identified by their form, which resembles a cone or a sphere. They are more common than others since most speakers already have them and because they are less expensive. However, they also have significant disadvantages, such as a low high-frequency range due to size and design restrictions. As a result, people tend to avoid choosing these when purchasing pricey home theater loudspeakers.
Silk dome coating on the dome tweeter produces a smooth and soft sound. However, they are not as sturdy as metal tweeters, so if you’re looking for longevity, you should go for metal ones rather than silk ones.
Another great feature of metal tweeters is their wide dispersion, which gives you greater freedom in where to put them within your automobile or home theater sound systems without losing the stereo imaging effect. Most people use these tweeters sparingly, however, because they are more expensive than other varieties and generate less harsh high-frequency tones.
How to install tweeters – Video Tutorial
Best Car Tweeters
Now that you know how to install your tweeters you probably want to know which tweeters are the best for your car, right?

Click here for the full in-depth review of the best tweeters for your car.